Unlocking the Secret to Perfect Classic Eclairs at Home
There's something undeniably captivating about a classic eclair. Its elegant elongated shape, the delicate crispness of the choux pastry, and the luscious burst of creamy filling all topped with a decadent glaze make it a beloved French patisserie staple. While many home bakers might shy away from attempting eclairs, deeming them too complex for a home kitchen, we're here to demystify the process. With the right guidance and a little patience, crafting impeccable, mouth-watering classic eclairs is not only achievable but immensely rewarding. Imagine the delight on the faces of your family and friends as they savor these homemade beauties, a testament to your newfound baking prowess!
The Allure of Classic Eclairs: More Than Just a Pastry
Eclairs, meaning "lightning" in French, are said to have earned their name either because they are eaten quickly, or because of the glistening glaze that catches the light. Originating in 19th-century France, likely from the renowned chef Marie-Antoine Carême, these pastries quickly rose to prominence and have since become a worldwide symbol of refined dessert. Beyond their historical charm, classic eclairs offer a delightful textural contrast: a light, airy choux pastry shell, often called pâte à choux, provides the perfect vessel for a rich, smooth pastry cream. They're versatile too, adaptable for any occasion, from an elegant dinner party dessert to a casual afternoon tea treat. This comprehensive guide ensures you'll create eclairs that are not just delicious but also visually stunning, proving that culinary sophistication can indeed be brought right into your kitchen.
Mastering the Choux Pastry: The Foundation of Perfect Eclairs
The heart of any exceptional eclair lies in its choux pastry. This isn't your typical flaky or crumbly dough; it's a unique creation that relies on steam to puff up and create its characteristic hollow interior. Don't be intimidated – follow these steps precisely, and you'll achieve a light, airy shell every time.
Ingredients for 20 Servings (Dough):
- 150g (1.25 cups) All-purpose flour
- 250 ml (1 cup) Water
- A pinch of Salt
- 100g (3.5 oz) Unsalted butter
- 3-4 large Eggs (approximately, adjust based on consistency)
Step-by-Step Dough Creation:
- Sift the Flour: Begin by sifting your flour through a fine sieve. This crucial step removes lumps and aerates the flour, contributing to a smoother dough.
- Boil the Base: In a sturdy saucepan, combine the measured water, a pinch of salt, and the butter. Place it over medium heat and bring it to a rolling boil. As soon as bubbles break the surface vigorously, remove the saucepan from the heat immediately to prevent too much water from evaporating.
- Incorporate the Flour: Now for the magical part. Add all the sifted flour into the hot liquid at once. Stir vigorously and continuously with a wooden spoon or spatula. The mixture will quickly come together, forming a smooth, uniform dough that pulls away cleanly from the sides and bottom of the pan. This process, known as panada, takes about 30 seconds.
- Dry the Dough: Return the saucepan to low heat. Continue stirring the dough for another 1-2 minutes. You'll notice a thin film forming on the bottom of the pan – this indicates the excess moisture is evaporating, which is vital for a crisp eclair.
- Cool and Transfer: Transfer the dough to a large mixing bowl. It's important to let it cool down slightly; it should be warm to the touch, not hot, before adding the eggs. This prevents the eggs from scrambling.
- Add the Eggs Gradually: This is perhaps the most critical stage. Add one egg to the warm dough and mix thoroughly until it's completely incorporated and the dough is smooth again. The dough might look curdled at first, but keep mixing until it comes back together. Continue adding the remaining eggs one at a time, mixing well after each addition. Pay close attention to consistency after the third egg. You're aiming for a dough that is glossy, smooth, and pliable, yet thick enough to hold its shape. When lifted with a spatula, it should form a "V" or "ribbon" shape and slowly drop. If it's too stiff after three eggs, add the fourth egg gradually, a teaspoon at a time, mixing after each addition, until the desired consistency is reached. A simple test: draw a line through the dough with a skewer; the line should hold without immediately melding back together.
Crafting the Creamy Heart: Exquisite Pastry Cream
What’s an eclair without its luxurious filling? The pastry cream, or crème pâtissière, is a silky, rich custard that perfectly complements the airy choux shell. While your eclairs are baking, this is the ideal time to prepare this decadent filling.
Ingredients for Pastry Cream:
- 375 ml (1.6 cups) Heavy cream (20% fat recommended)
- 2 large Eggs
- 1 tablespoon (8g) All-purpose flour
- 180g (0.8 cups) Granulated sugar
- 1 teaspoon (5 ml) Vanilla sugar (or 1 tsp vanilla extract)
- 50-70g (1.75-2.5 oz) Unsalted butter, cut into small pieces
Whipping Up Your Custard:
- Heat the Cream: In a saucepan, gently heat the heavy cream until it just reaches a boil. Once it boils, remove it from the heat.
- Prepare Egg Mixture: In a separate, heat-proof bowl, beat the eggs. Sift the flour into the eggs and whisk thoroughly until no lumps remain. Then, add the sugar and vanilla sugar (or vanilla extract) and mix again until well combined.
- Temper the Eggs: Gradually pour the hot cream into the egg mixture while continuously whisking. This process, called tempering, prevents the eggs from scrambling and ensures a smooth custard base.
- Cook the Cream: Transfer the entire mixture back to the saucepan. Cook over medium heat, stirring constantly with a whisk or spatula. It’s crucial to keep stirring to prevent scorching and ensure even thickening. The cream will begin to thicken significantly; continue cooking until it's thick enough to coat the back of a spoon, about 3-5 minutes.
- Finish with Butter: Remove the saucepan from the heat. Add the pieces of butter to the hot cream and stir until they are completely melted and incorporated, adding an extra layer of richness and silkiness.
- Cool the Cream: Let the pastry cream cool down completely. For best results, cover the surface with plastic wrap, pressing it directly onto the cream to prevent a skin from forming. Once cooled, you can give it a quick whisk to regain its smooth consistency before filling.
Shaping, Baking, and Finishing: Bringing Your Eclairs to Life
The final stages are where your classic eclairs truly come into their own. Precise piping, careful baking, and elegant finishing touches transform the simple dough and cream into an impressive dessert.
Piping and Baking Perfection:
- Preheat and Prep: Preheat your oven to a hot 200°C (392°F). Line a baking sheet with high-quality parchment paper. A good non-stick parchment paper is essential to prevent sticking.
- Pipe the Dough: Transfer the prepared choux pastry to a sturdy piping bag fitted with a large round or star tip. If you don’t have a piping bag, a strong plastic freezer bag with one corner snipped off will work in a pinch. Pipe strips of dough about 10-12 cm (4-5 inches) long onto the prepared baking sheet. Leave at least 3 cm (1 inch) between each eclair to allow for expansion during baking. For uniform size, you can draw guidelines on the back of the parchment paper.
- The Bake: Place the baking sheet on the middle rack of your preheated oven. Bake at 200°C (392°F) for 20 minutes. Crucially, do not open the oven door during this time. The steam trapped inside is what causes the eclairs to puff up.
- Reduce Heat and Continue: After 20 minutes, reduce the oven temperature to 160°C (320°F) and bake for an additional 10 minutes. Again, resist the urge to open the oven door. This lower temperature helps dry out the pastry, ensuring a crisp shell that won't collapse.
- Cool Completely: Once baked, turn off the oven, crack the door slightly, and allow the eclairs to cool inside for about 5-10 minutes. Then, transfer them to a wire rack to cool completely. They must be entirely cool before filling to prevent the pastry cream from melting and making the shells soggy.
Filling and Finishing Touches:
- Fill with Cream: Once your eclairs are cooled and your pastry cream is ready, it's time to fill. There are a couple of methods:
- Side Slits: Use a small, sharp knife to make 2-3 small slits on the underside or side of each eclair. Fit a piping bag with a small, plain round tip, fill it with pastry cream, and pipe the cream into each eclair through the slits until plump.
- Pastry Syringe: For a cleaner look, use a pastry syringe with a long, thin nozzle. Make small holes on the bottom of the eclairs and inject the cream.
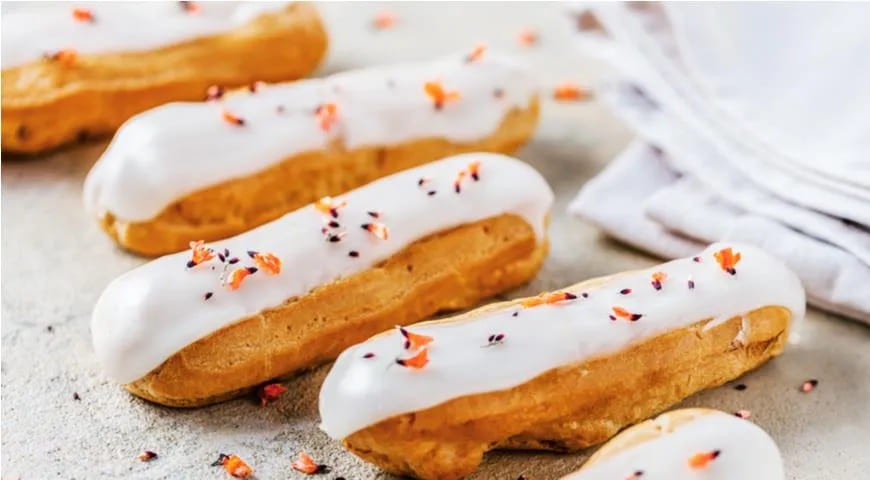
- Garnish: The traditional finish for classic eclairs is a rich chocolate glaze. Melted chocolate, a simple confectioners' sugar glaze, or even sweetened whipped cream are excellent optional toppings. For a professional touch, dip the top of each eclair into warm glaze and allow it to set.
Nutrition (Per Serving - based on 20 servings):
- Calories: 313.72 kcal
- Protein: 5.07g
- Fat: 20.56g
- Carbohydrates: 27.09g
Enjoying a homemade eclair is a treat that's well worth the effort. These nutritional values provide a general idea, but remember, the joy of a homemade treat often outweighs strict calorie counting!
Conclusion
From the delicate dance of creating choux pastry to the luxurious embrace of homemade pastry cream and the final flourish of a perfect glaze, mastering classic eclairs is a journey that transforms a simple recipe into an art form. While the process requires attention to detail, each step is straightforward, leading to an incredibly rewarding outcome. These elegant pastries are a testament to the joy of baking and the simple pleasure of sharing delicious, homemade treats. So, roll up your sleeves, gather your ingredients, and embark on your own eclair adventure – you'll be surprised at how easily you can create a patisserie-quality dessert right in your very own kitchen. Get ready to impress and delight!
